Configuring and Assigning Loadouts
Oftentimes, different workers or work place conditions require specific safety settings to be applied. Loadouts inside the SlateSafety platform provide the ability to create those different configurations depending on the required scenarios.
Here's how to create and assign a Loadout to a user
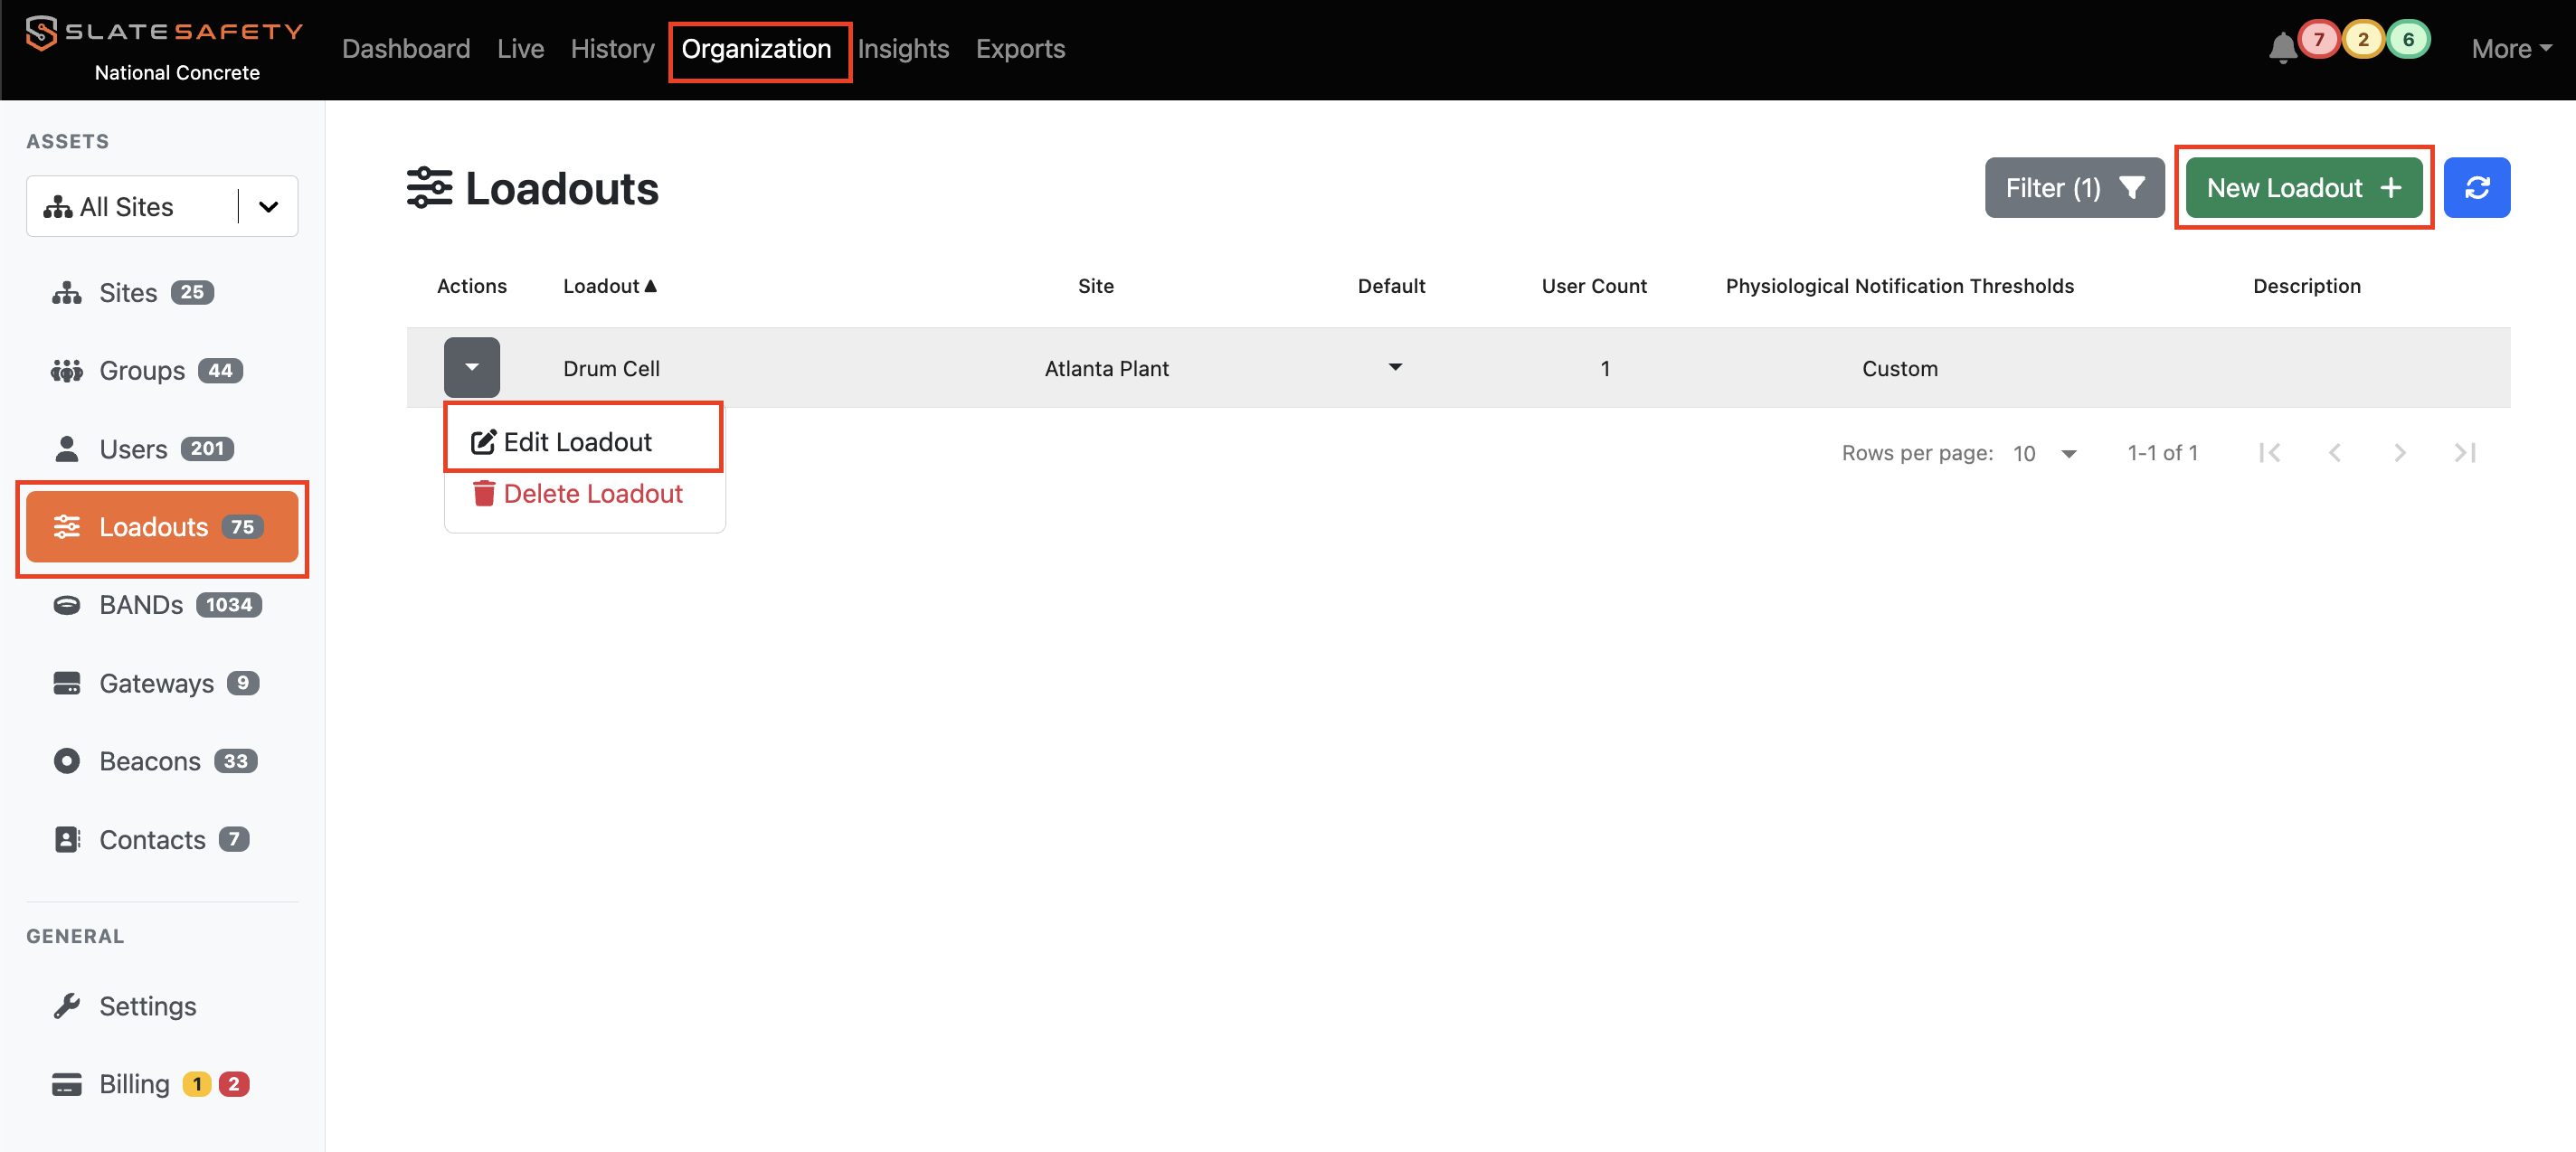
- From the Organization tab find the Loadout tab, and either edit an existing Loadout or create a new one.
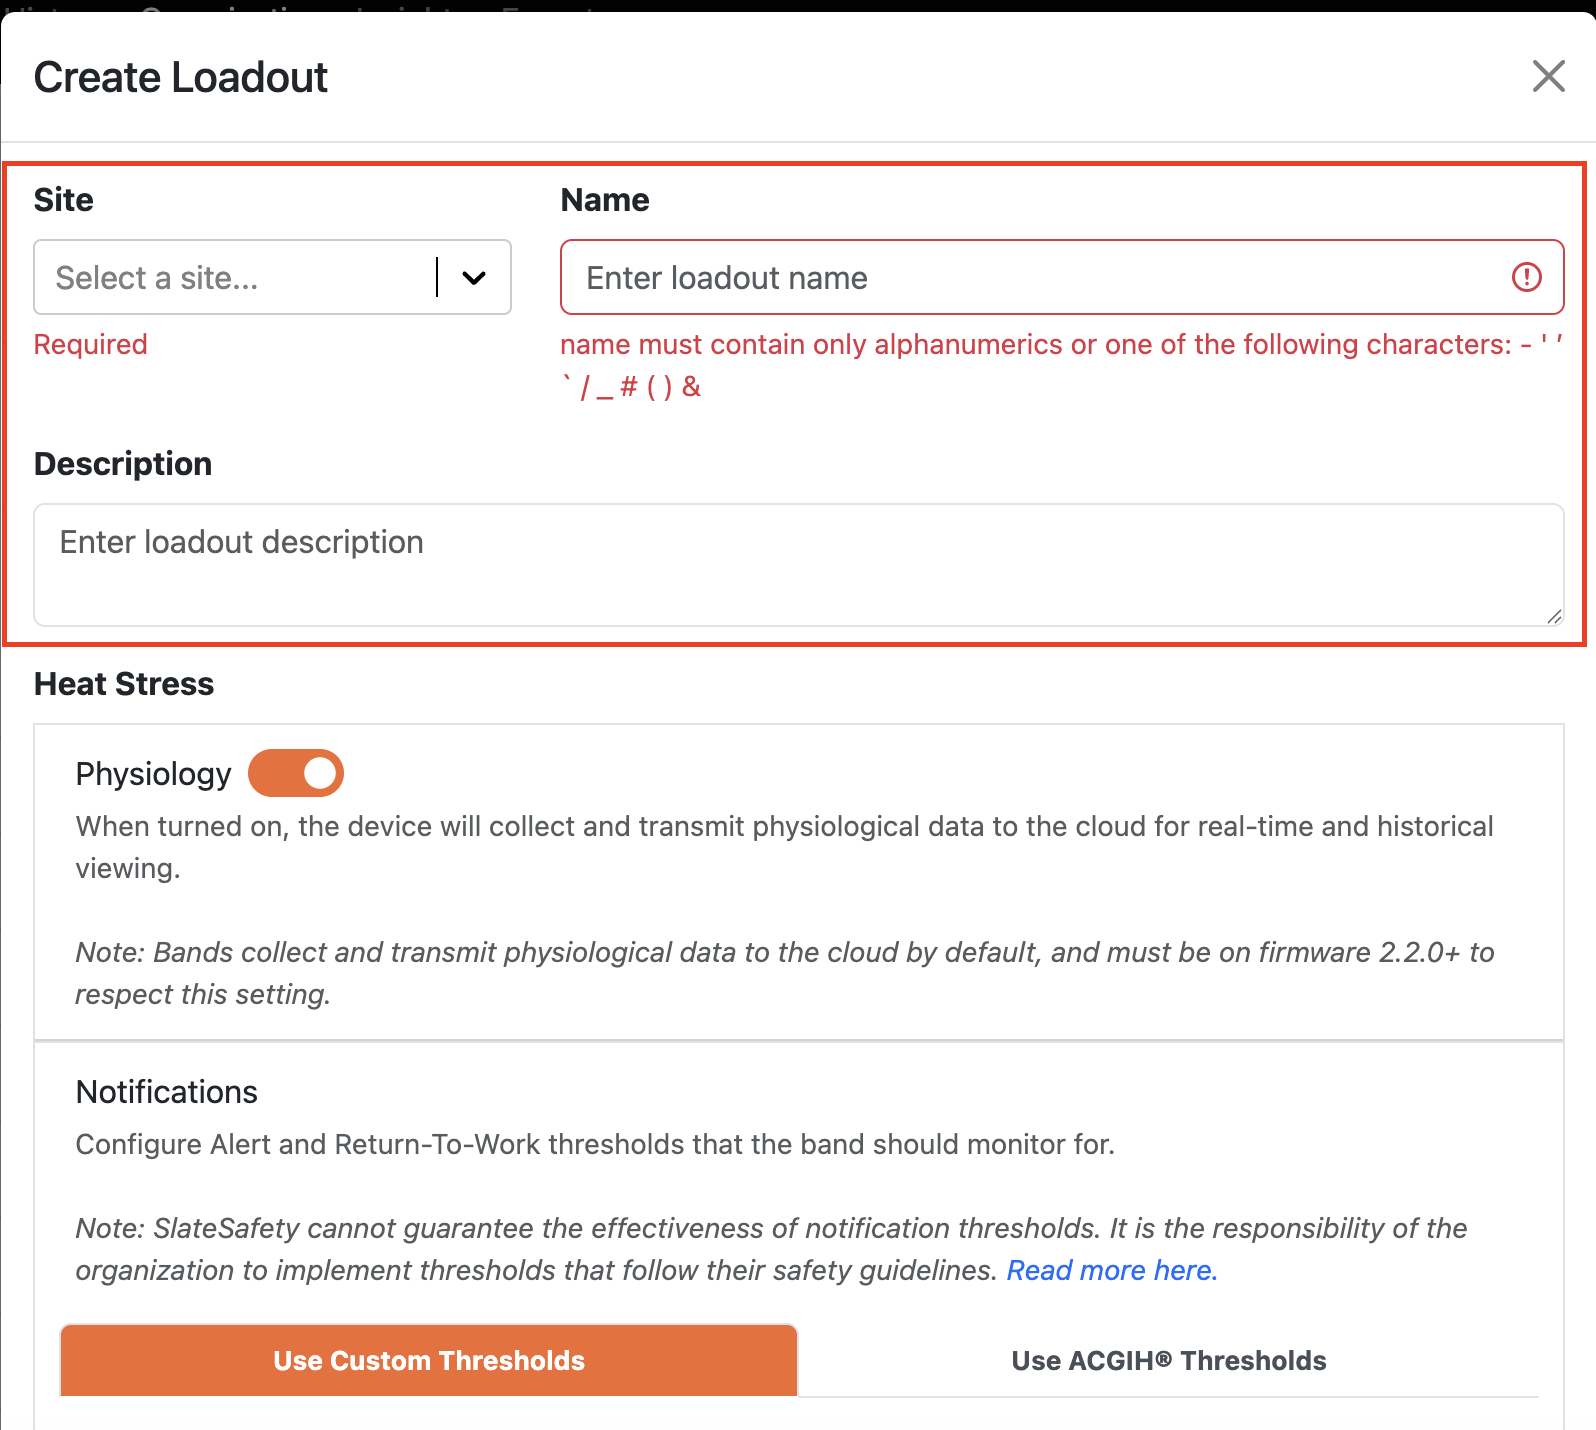
- For a new Loadout, name it and provide a description of when this Loadout would be used.
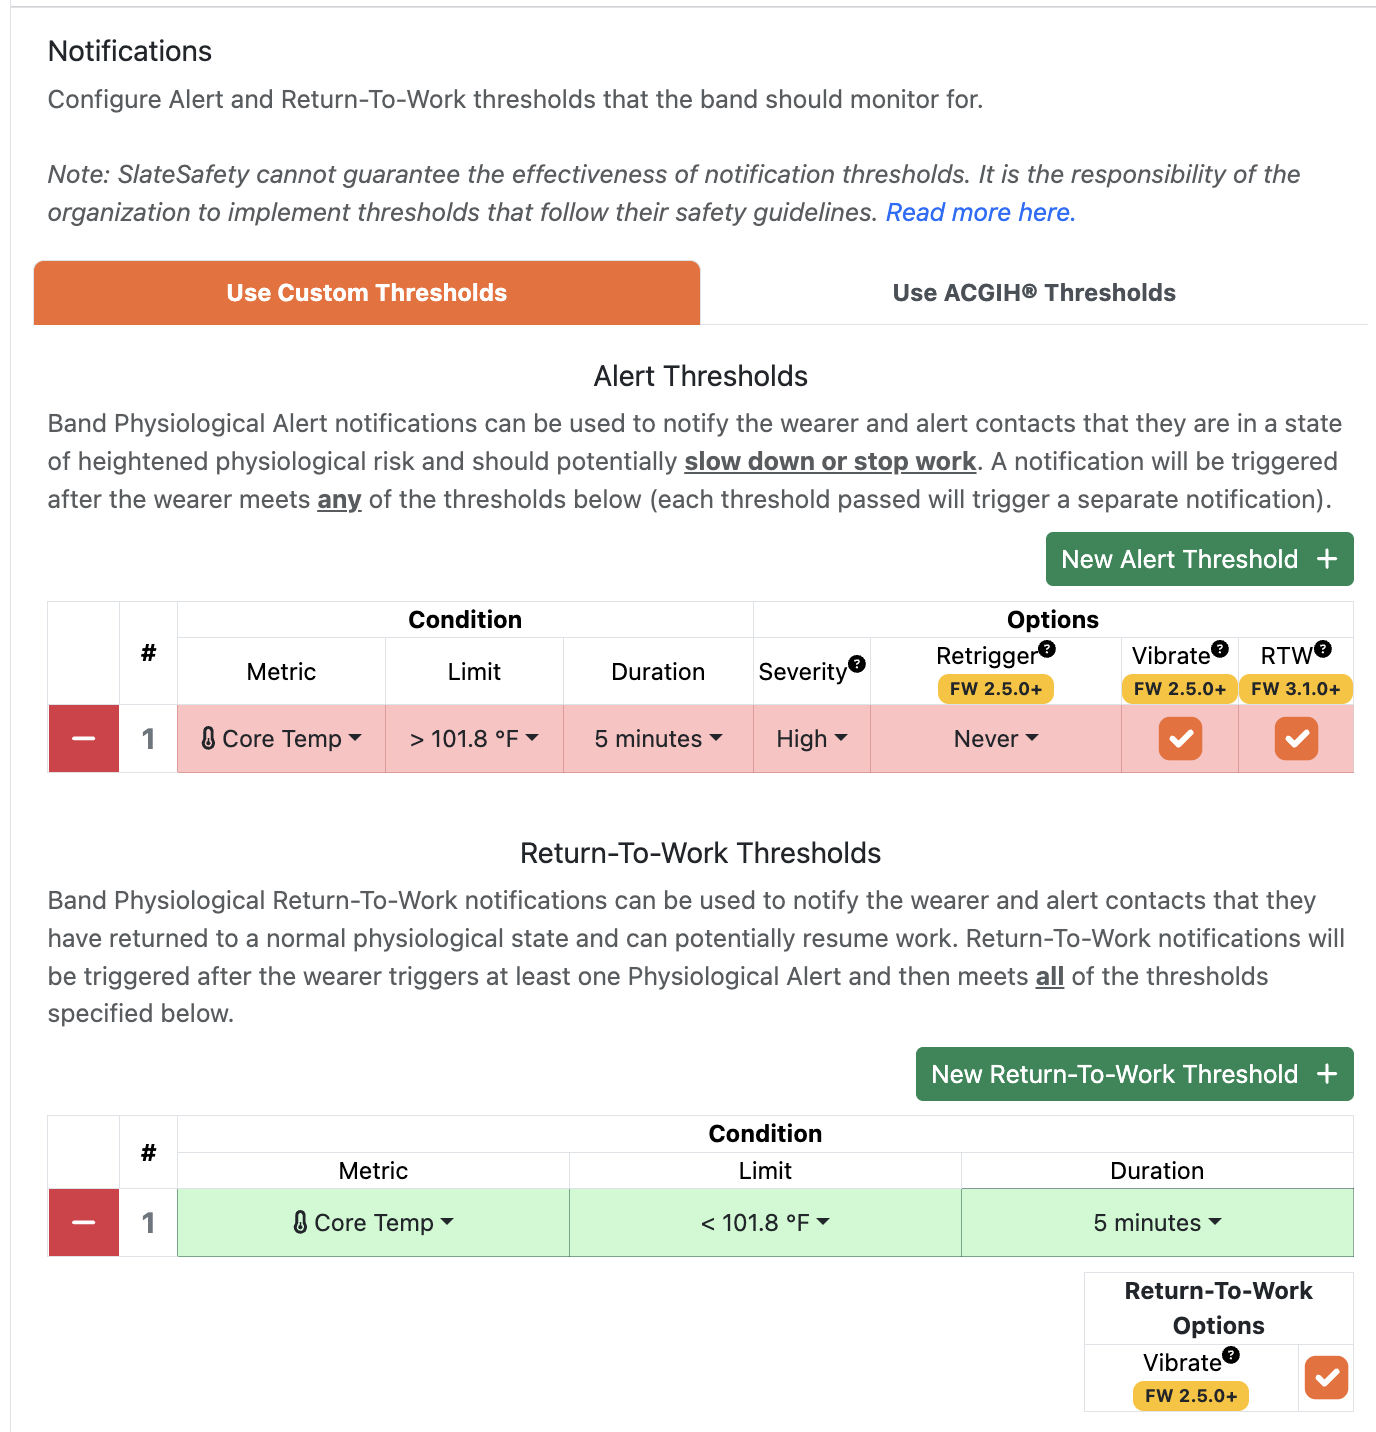
- Next, you can create physiological alerts thresholds that can provide notifications when a worker goes above a specific thresholds and when they can return to work safely. Everything you need to know about Alert and Return-To-Work Notifications is a great place to learn more.
- Finally, select the Lone Worker specific features to be enabled on this Loadout.

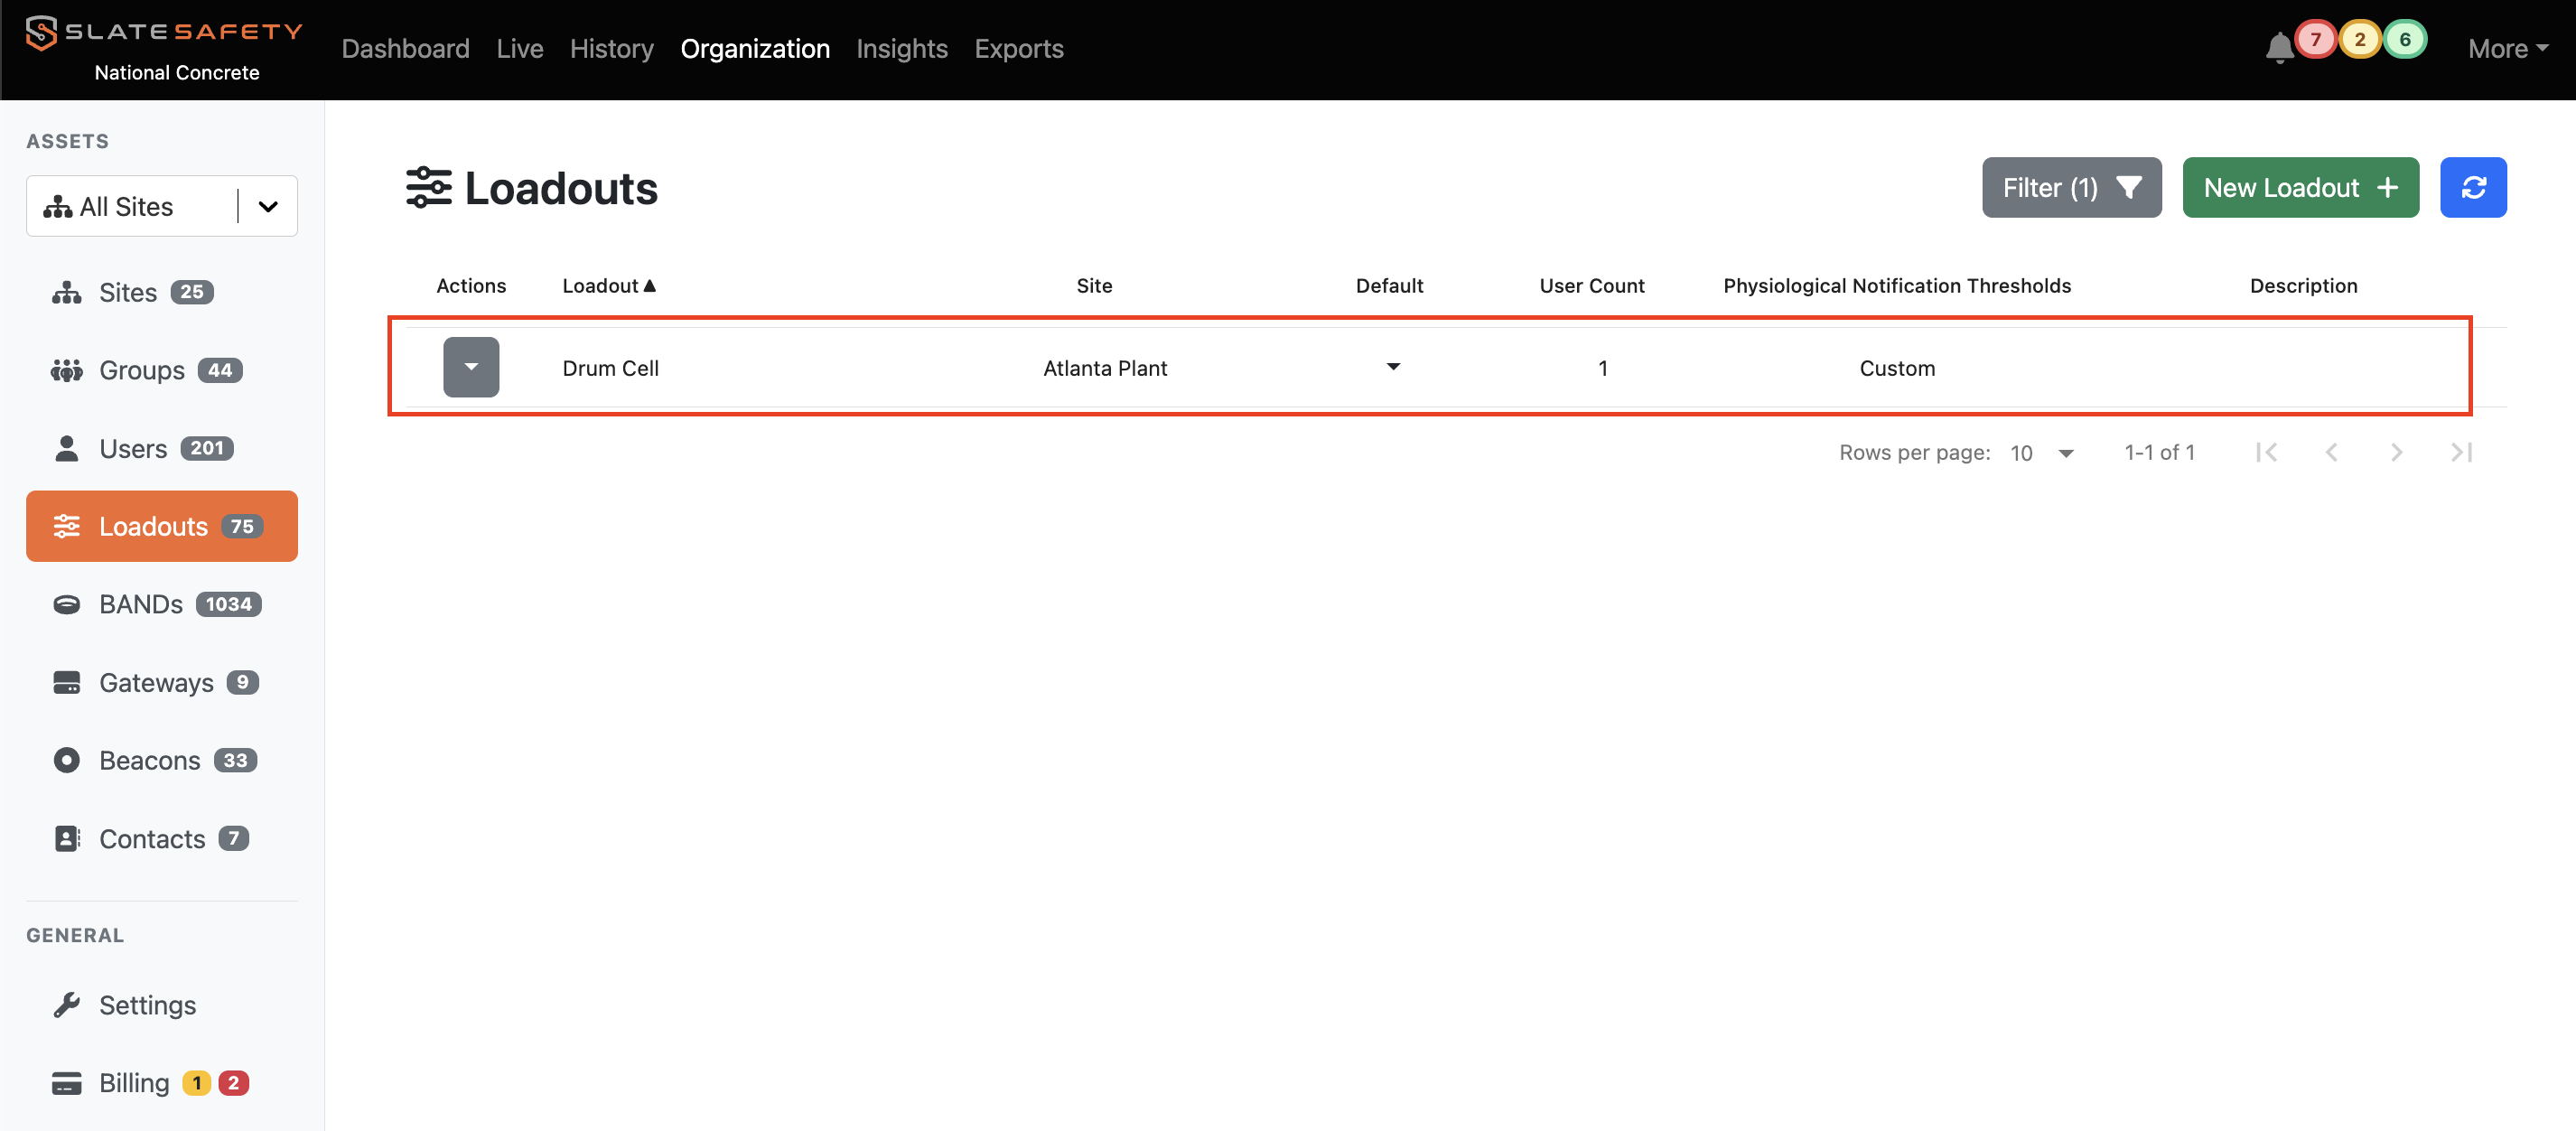
- The newly created Loadout is now available to be assigned to the respective users that need it.
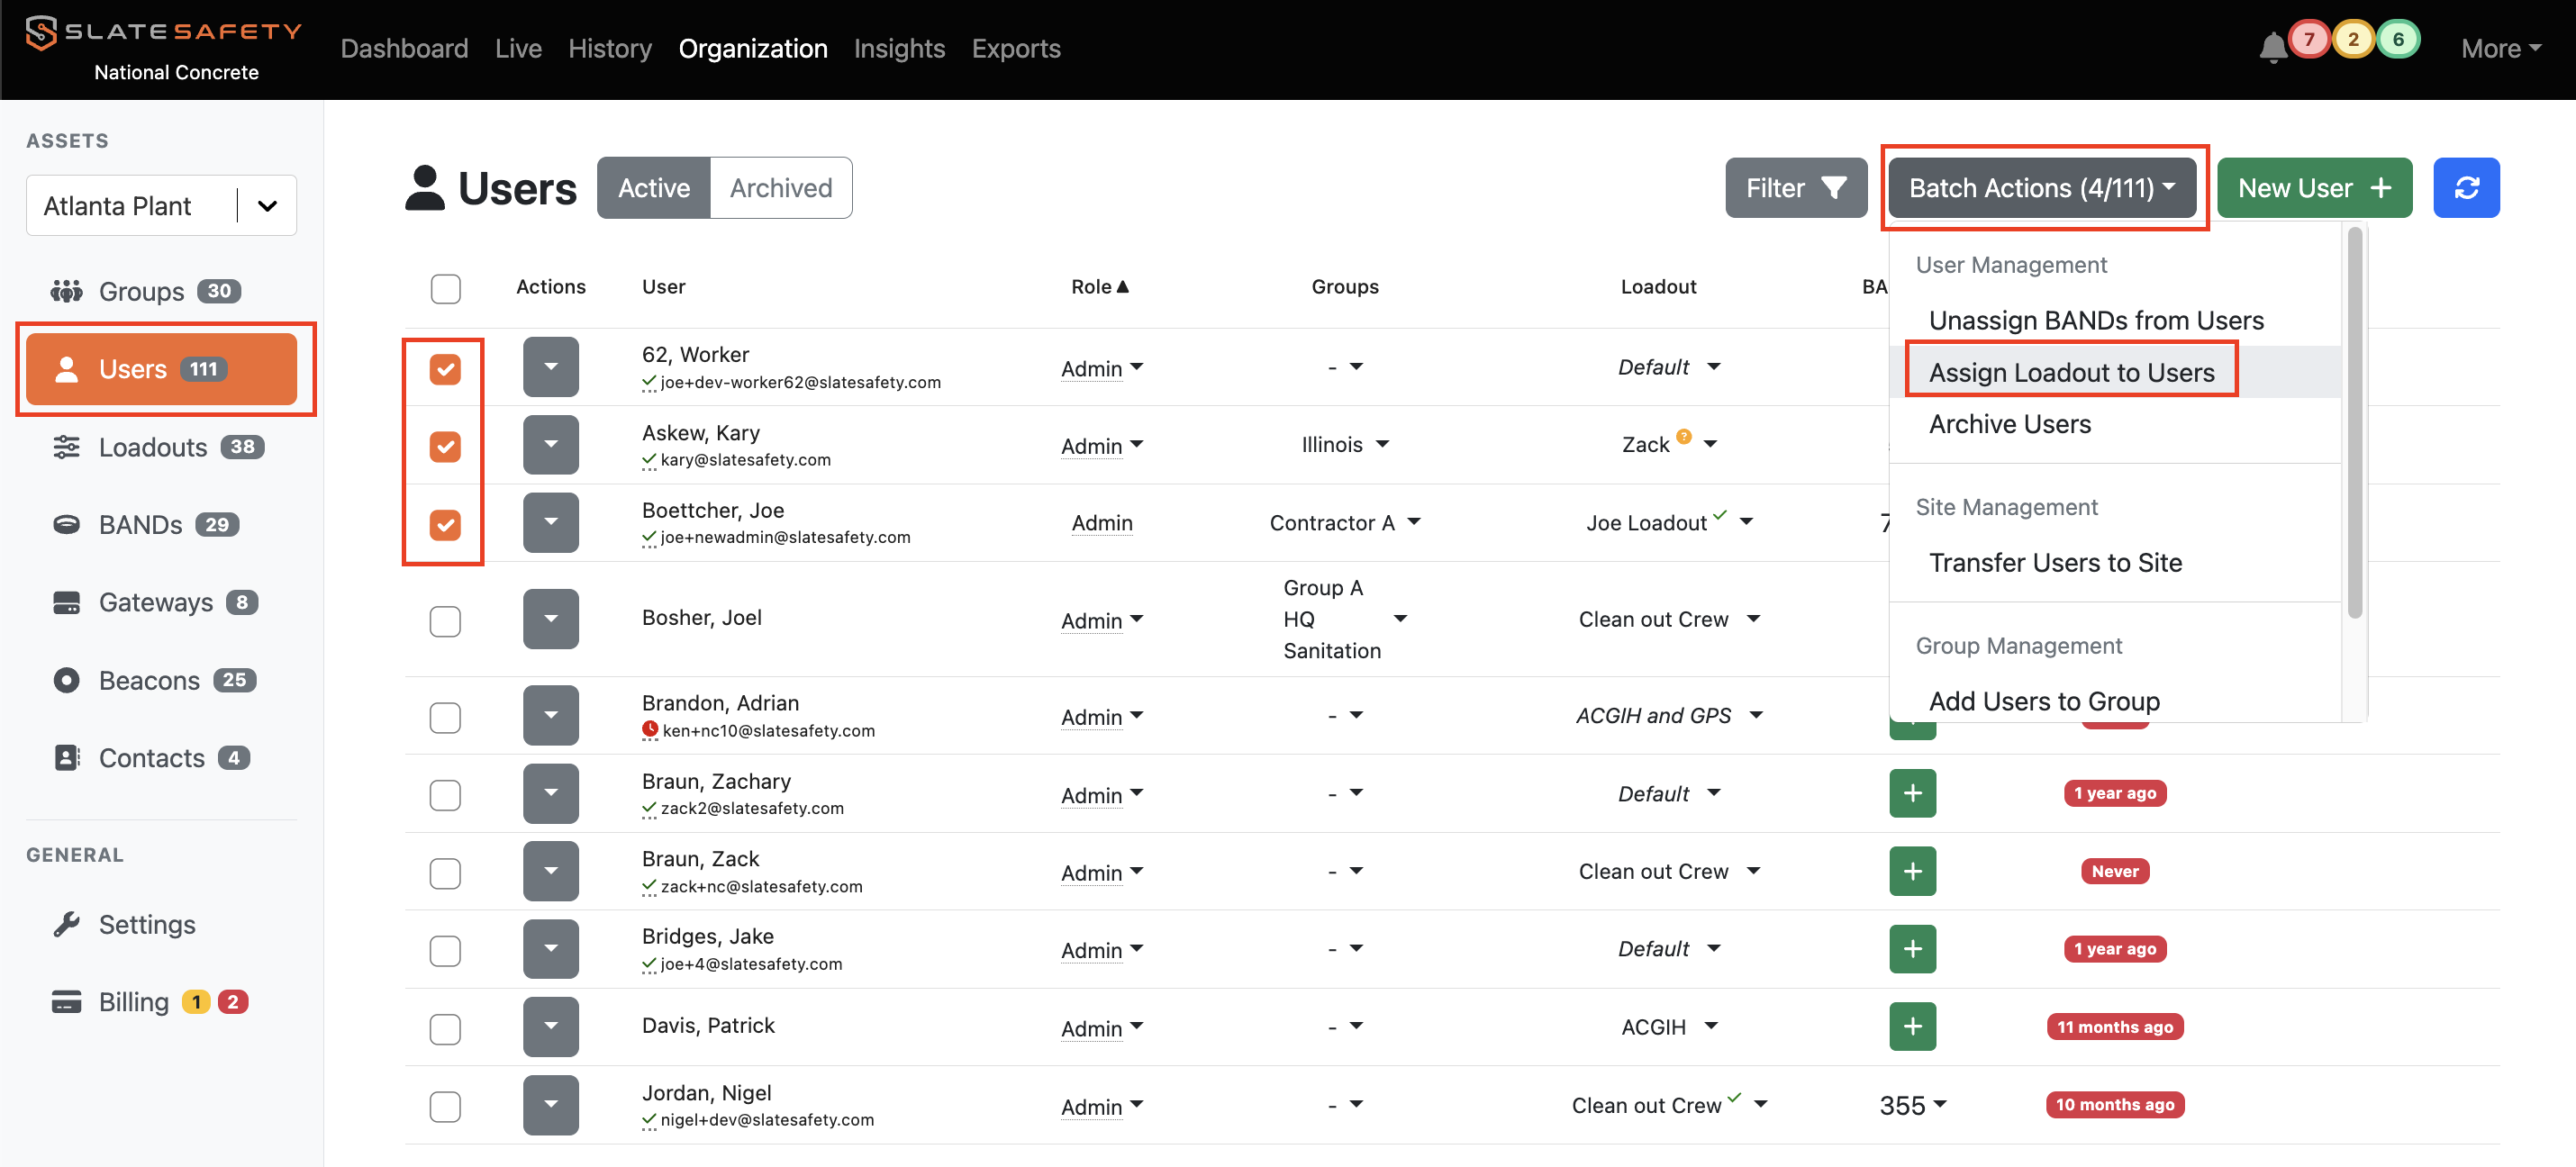
- From the User tab select the user(s) you'd like to assign the new loadout too. Then click the batch action button and select the option to 'Assign Loadout to Users'.
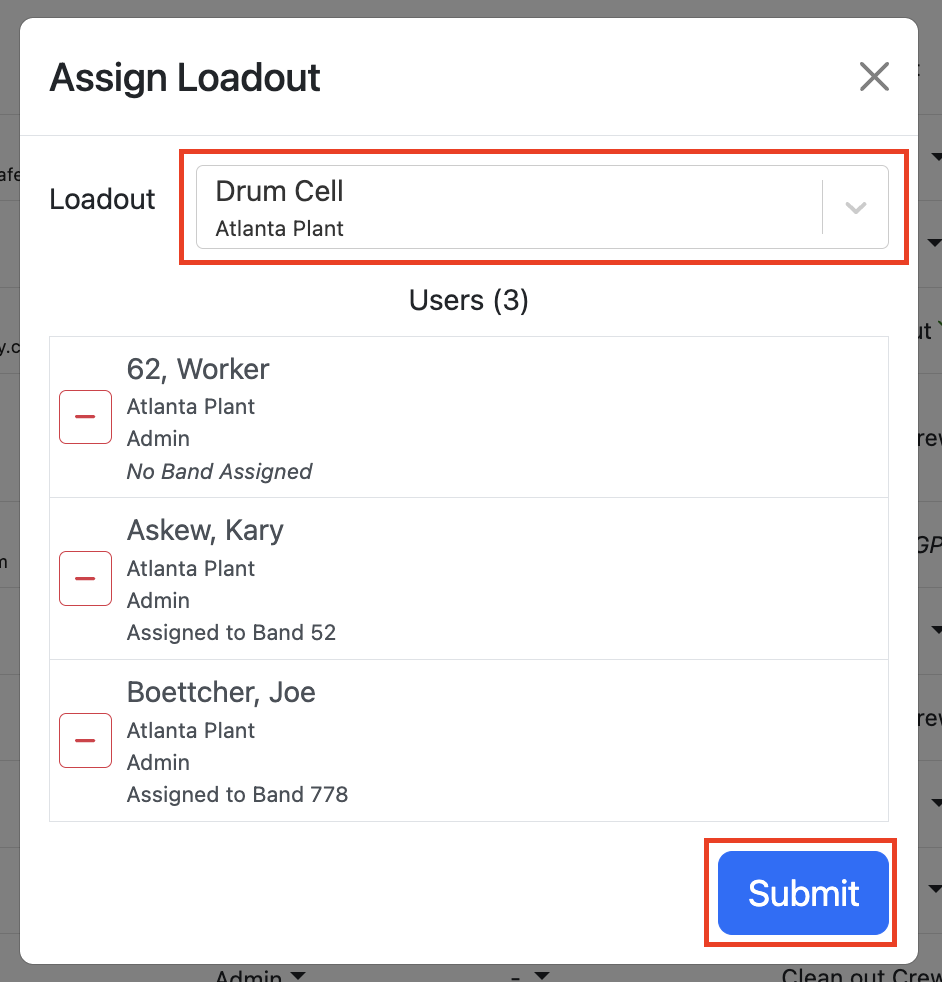
- Finally, select the newly created Loadout to assign. Click submit.
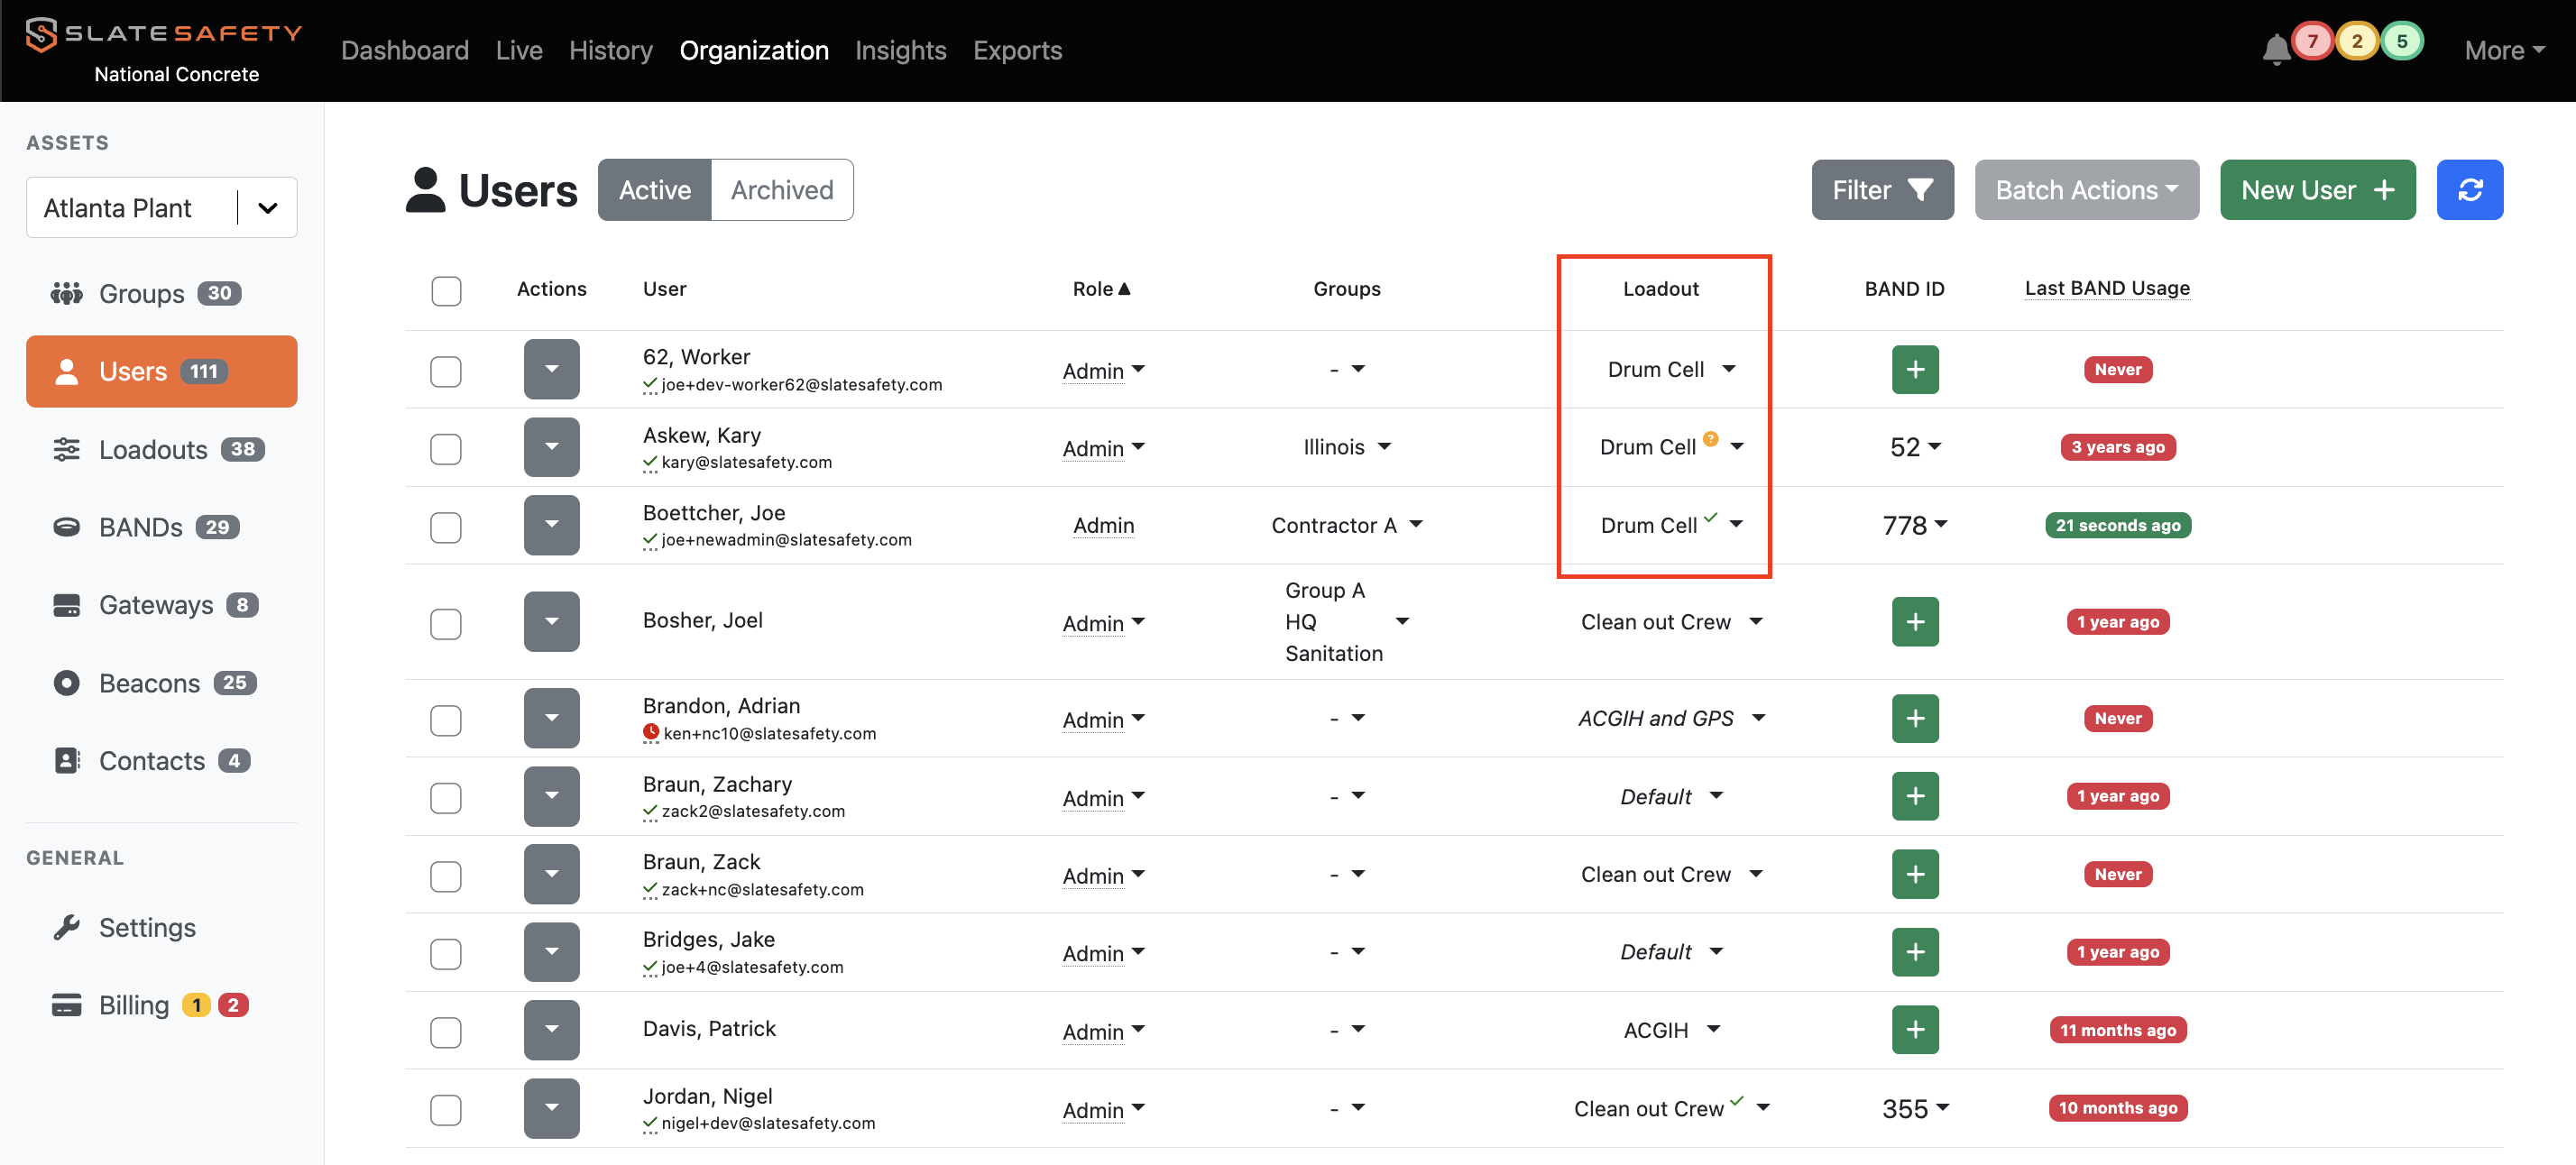
- The users selected have now been assigned the new Loadout and will follow the configuration provided. IMPORTANT: The syncing of the new Loadout to the physical device being worn by a user can take a couple of minutes depending on connectivity.
Tips for better Loadouts
The following represents a general set of guidelines to keep in mind when crafting your loadouts. It is not meant to be a definitive guide to ideal alert thresholds or settings, but rather scenarios and situations to be aware of. SlateSafety does not recommend or prescribe a specific loadout configuration, as every organization's work and safety practices are different.
- Be mindful of "alert fatigue" when crafting your loadout and how it relates to your heat stress program. A loadout that establishes several low severity thresholds may provide an convenient way to give warnings to wearers, but too many alerts may cause wearers to become numb to high severity alerts for which they should stop work. Striking a balance is key to keep your wearers aware of their current risk, while also not overwhelming them.
- Use separate loadouts to handle groups of heterogenous wearers or workloads. When starting out, it may be tempting to centralize all configuration in one loadout. If your Band wearers are of similar age and handle similar workloads, then this may be reasonable. However, if your wearers are very diverse in age, body type, or job responsibilities, a single loadout may not provide the best coverage for your wearers. For example, it may make sense to create a separate loadout for wearers over 70 years old that utilizes HRLV instead of Heart Rate, or a loadout that uses Exertion over Heart Rate if a wearer has a cardio-intensive job and will be consistently maintaining a high heart rate.
- Be cautious when mixing the metrics used for alert thresholds and return-to-work thresholds. It can make sense to use separate metrics for triggering alerts and return-to-works, but when doing so admins should anticipate the scenarios that may arise. For example, an alert threshold for HRLV greater than 70% and a return-to-work threshold for Heart Rate less than 120 may work fine for a wearer that is 30 years old, but for a 70 year old user, the return-to-work will trigger almost immediately after the alert (since HRLV accounts for a user's age, but Heart Rate is a raw measurement).