How to Use GATEWAY V2s
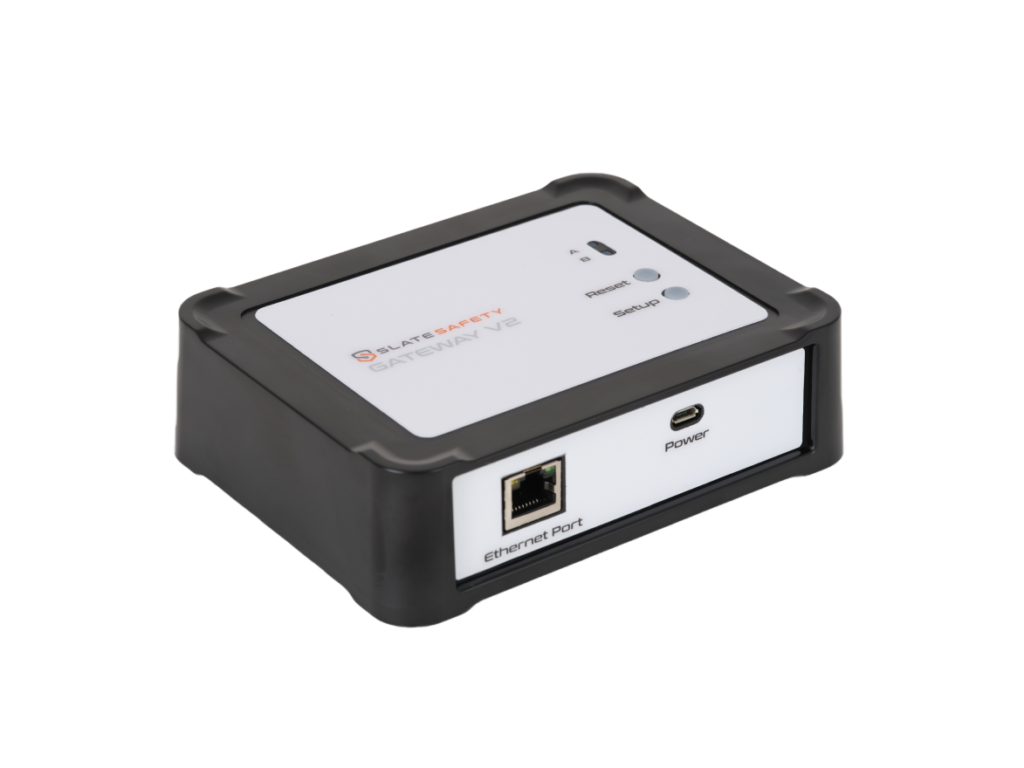
What is a GATEWAY V2?
The SlateSafety GATEWAY V2 relays data from nearby BAND V2s and BEACON V2s. GATEWAY V2s are typically used in areas where BAND V2s are unable to connect directly to the SlateSafety cloud because there is degraded cellular service. The GATEWAY V2 connects to the SlateSafety cloud over an organization's WiFi or Ethernet network.
For more: GATEWAY V2 Manual
What is the range of a GATEWAY V2 with BAND V2s?
In typical settings, the range is 0.25 miles (400 meters). Theoretically, the line-of-sight range is 0.5 miles (800 meters). The actual range is dependent on the radiofrequency (RF) environment.
What is the range of a GATEWAY V2 with BEACON V2s?
In typical settings, the range is 200 feet (60 meters). The actual range is dependent on the radiofrequency (RF) environment.
What do the indicator lights (LEDs) mean?
LED A
Each red blink means that data is being received from nearby BAND V2s or BEACON V2s.
LED B
| LED B Pattern | Meaning |
| 🟥 Blinking Red | Not connected to Internet. The setup button has been pressed. So any stored WiFi credentials have been deleted. The Gateway is waiting to be provisioned. |
| 🟥 Solid Red | Not connected to Internet. Not attempting. |
| 🟪 Blinking Magenta | Not connected to Internet. The Gateway is attempting to connect to Internet via WiFi or Ethernet. |
| 🟦 Blinking Blue | Connected to Internet, but not connected to the SlateSafety Cloud. Attempting to connect to SlateSafety Cloud. |
| 🟦 Solid Blue | Connected to SlateSafety Cloud. |
Note: Gateway version 3.0.1 or newer is required for these indications.
GATEWAY V2 configuration for IT:
The GATEWAY V2 uses the DHCP protocol to obtain an IP address. If your network configuration requires that each GATEWAY V2 always uses the same IP address, follow these steps:
- The GATEWAY V2 has two network interfaces, Ethernet and WiFi. Obtain the GATEWAY V2's MAC addresses for both network interfaces. The MAC addresses for each GATEWAY V2 can be found on the Organization Page in the Gateways tab.
- On the DHCP Server, reserve an IP address for each MAC address. That would result in each GATEWAY V2 having two reserved IP addresses, one IP address for Ethernet and one IP address for WiFi.
- If your network configuration restricts traffic for external devices, ensure that they open the following ports:
- DNS (UDP Traffic) Port 53
- MQTTS (TCP Traffic) Port 8883 with endpoint iot.slatesafety.com and iot2.slatesafety.com
- HTTPS (TCP Traffic) Port 443 with endpoint https://slatesafety-v2-jobs-988961575222.s3.us-east-1.amazonaws.com
- SNTP (UDP Traffic) Port 123 with endpoints time-a-g.nist.gov and pool.ntp.org
How to mount a GATEWAY V2 on the wall:
The Gateway can either be sat on a table or mounted on a wall.
To mount the Gateway on a wall, there are two options:
- (Preferred) use the wall mounting plate and 4 screws.
- Or use the double-sided adhesive that comes in the kit to adhere the Gateway to the wall.
It is recommended to place the Gateway in an open environment away from masses of metal. Placing the Gateway on an elevated surface will also boost the effective range.
How to setup a GATEWAY V2 on Ethernet:
- Plug in the power cable for the GATEWAY V2.
- Plug in the ethernet cable to the GATEWAY V2.
- Wait a couple of minutes for the connection to propagate, the indicator light labeled B on the GATEWAY V2 should turn blue. Blue indicates that it is successfully connected to the SlateSafety cloud.
- If BAND V2s or BEACON V2s are nearby a GATEWAY V2, then the indicator light labeled A should occasionally flash red. Red flashes occur when the GATEWAY V2 successfully receives data from nearby BAND V2s and BEACON V2s.
How to setup a GATEWAY V2 on WiFi using SlateSafety Go:
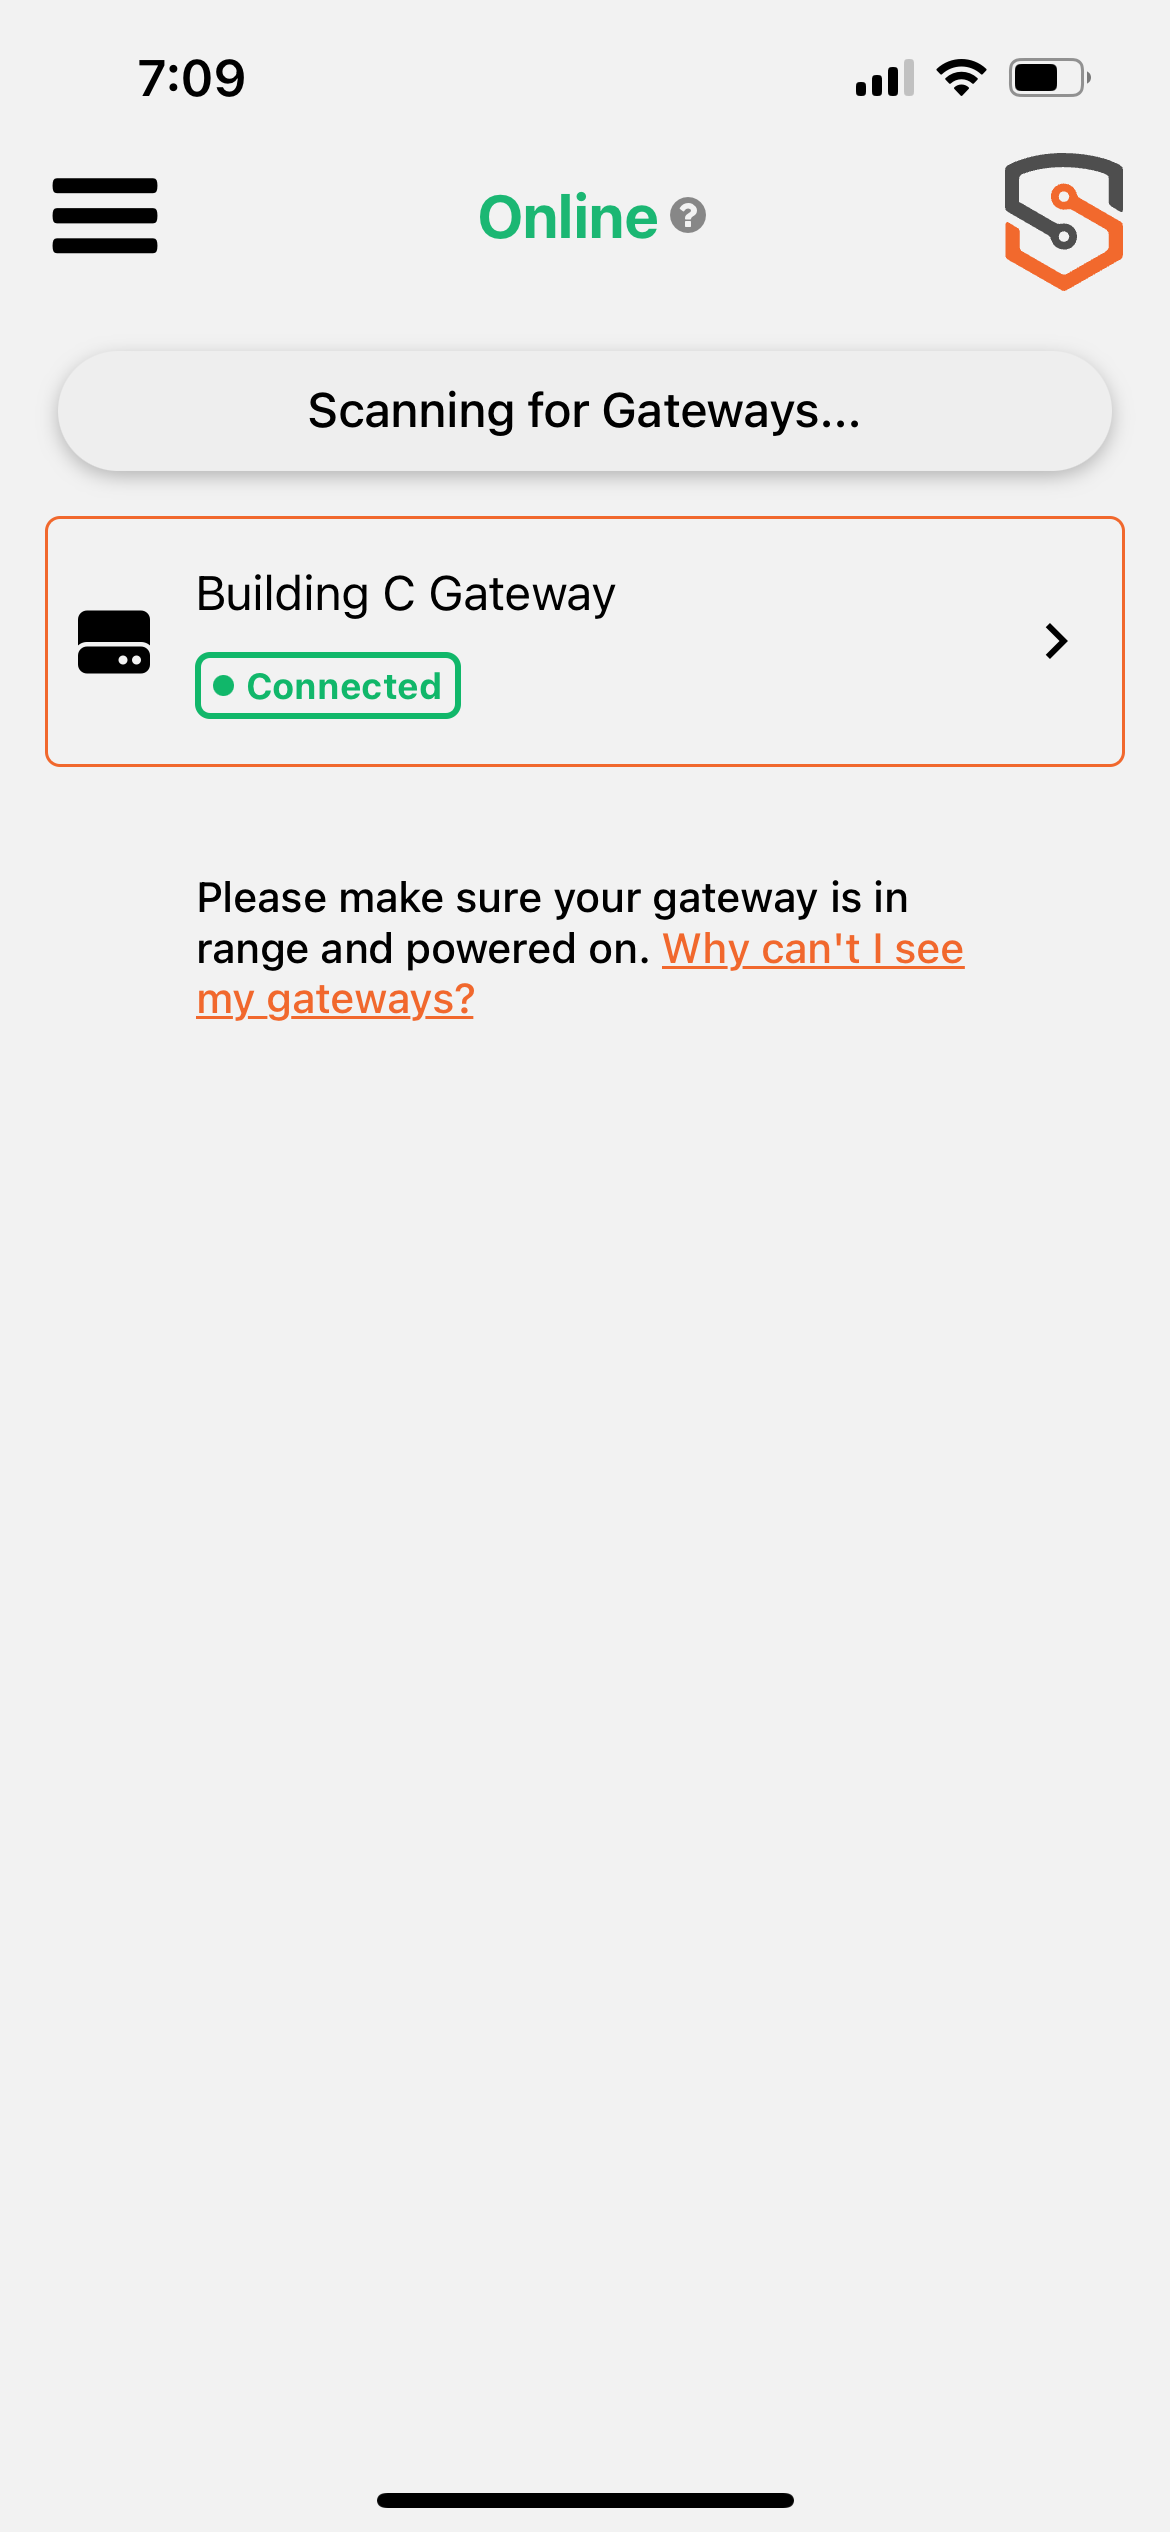
- Plug in the power cable for the GATEWAY V2.
- Open SlateSafety Go on your iOS or Android device. Install SlateSafety Go if you have not already.
- Login to SlateSafety Go.
- Open the "Gateway Provisioner" page.
- Tap "Scan for Gateways".
- Note 1: If you do not see your Gateway in the list below, then try moving closer to the Gateway. Ensure the Gateway is powered. Press the "SETUP" button on the top of the Gateway.
- Note 2: If you are using an iPhone, ensure that Bluetooth permissions are enabled for SlateSafety Go in Settings > Apps > SlateSafety Go > Bluetooth
- Tap on the Gateway that you want to provision.
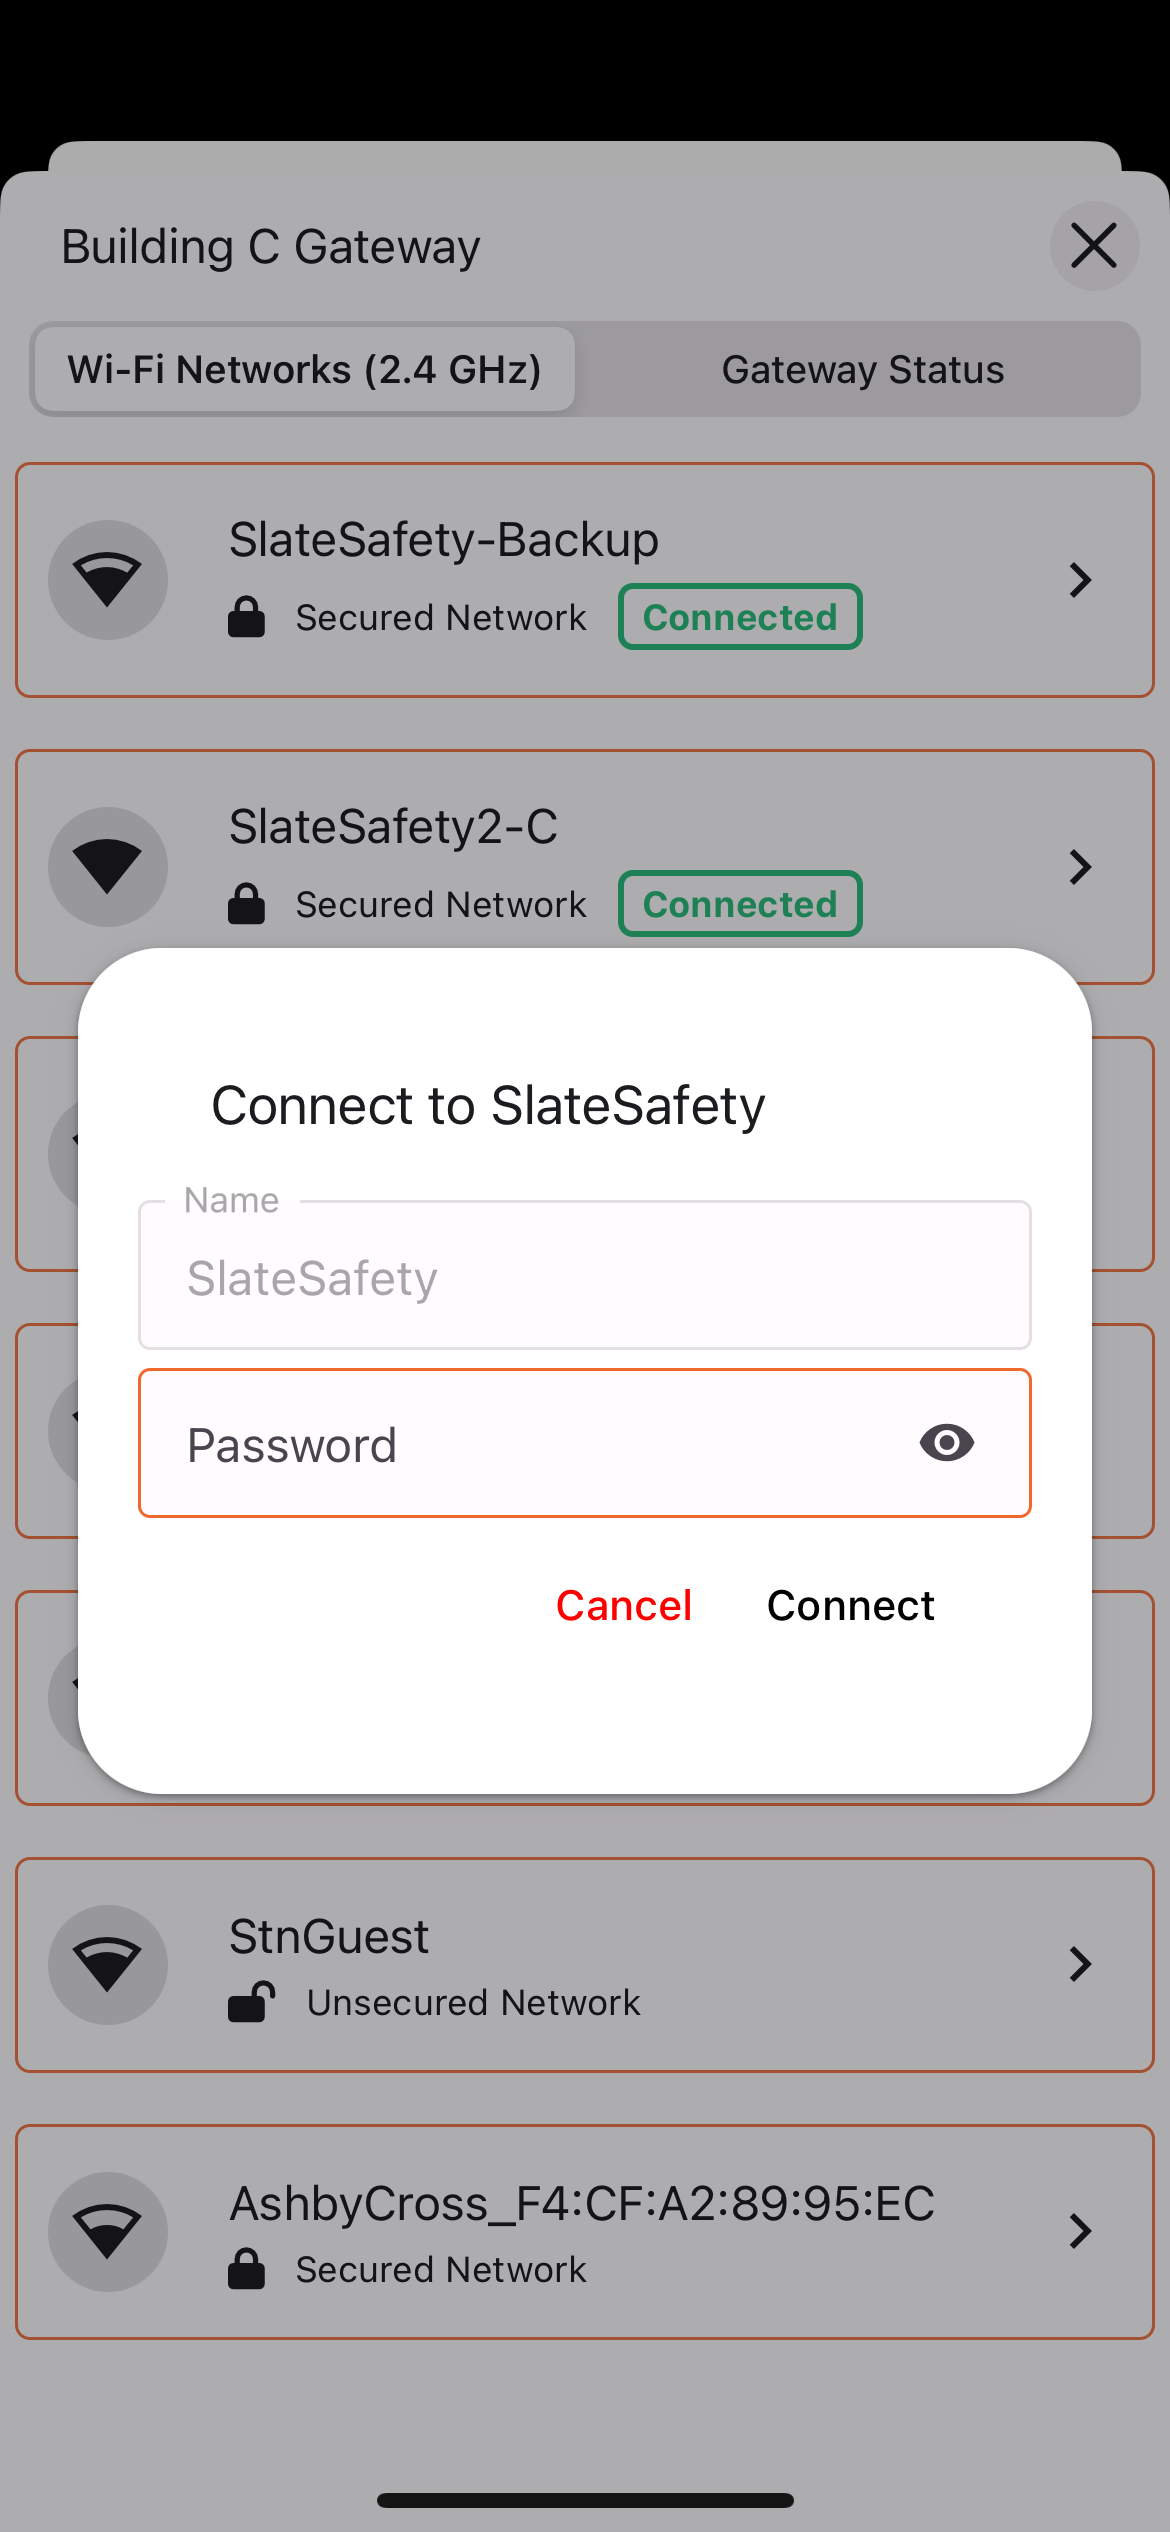
- Select the WiFi network that you want the Gateway to connect to.
- Note: If it takes over 30 seconds to connect your phone to the Gateway, then press Cancel and try to connect again.
- Enter in the password for the WiFi if required.
- Note: If there is no password to your WiFi, then simply leave the password field blank.
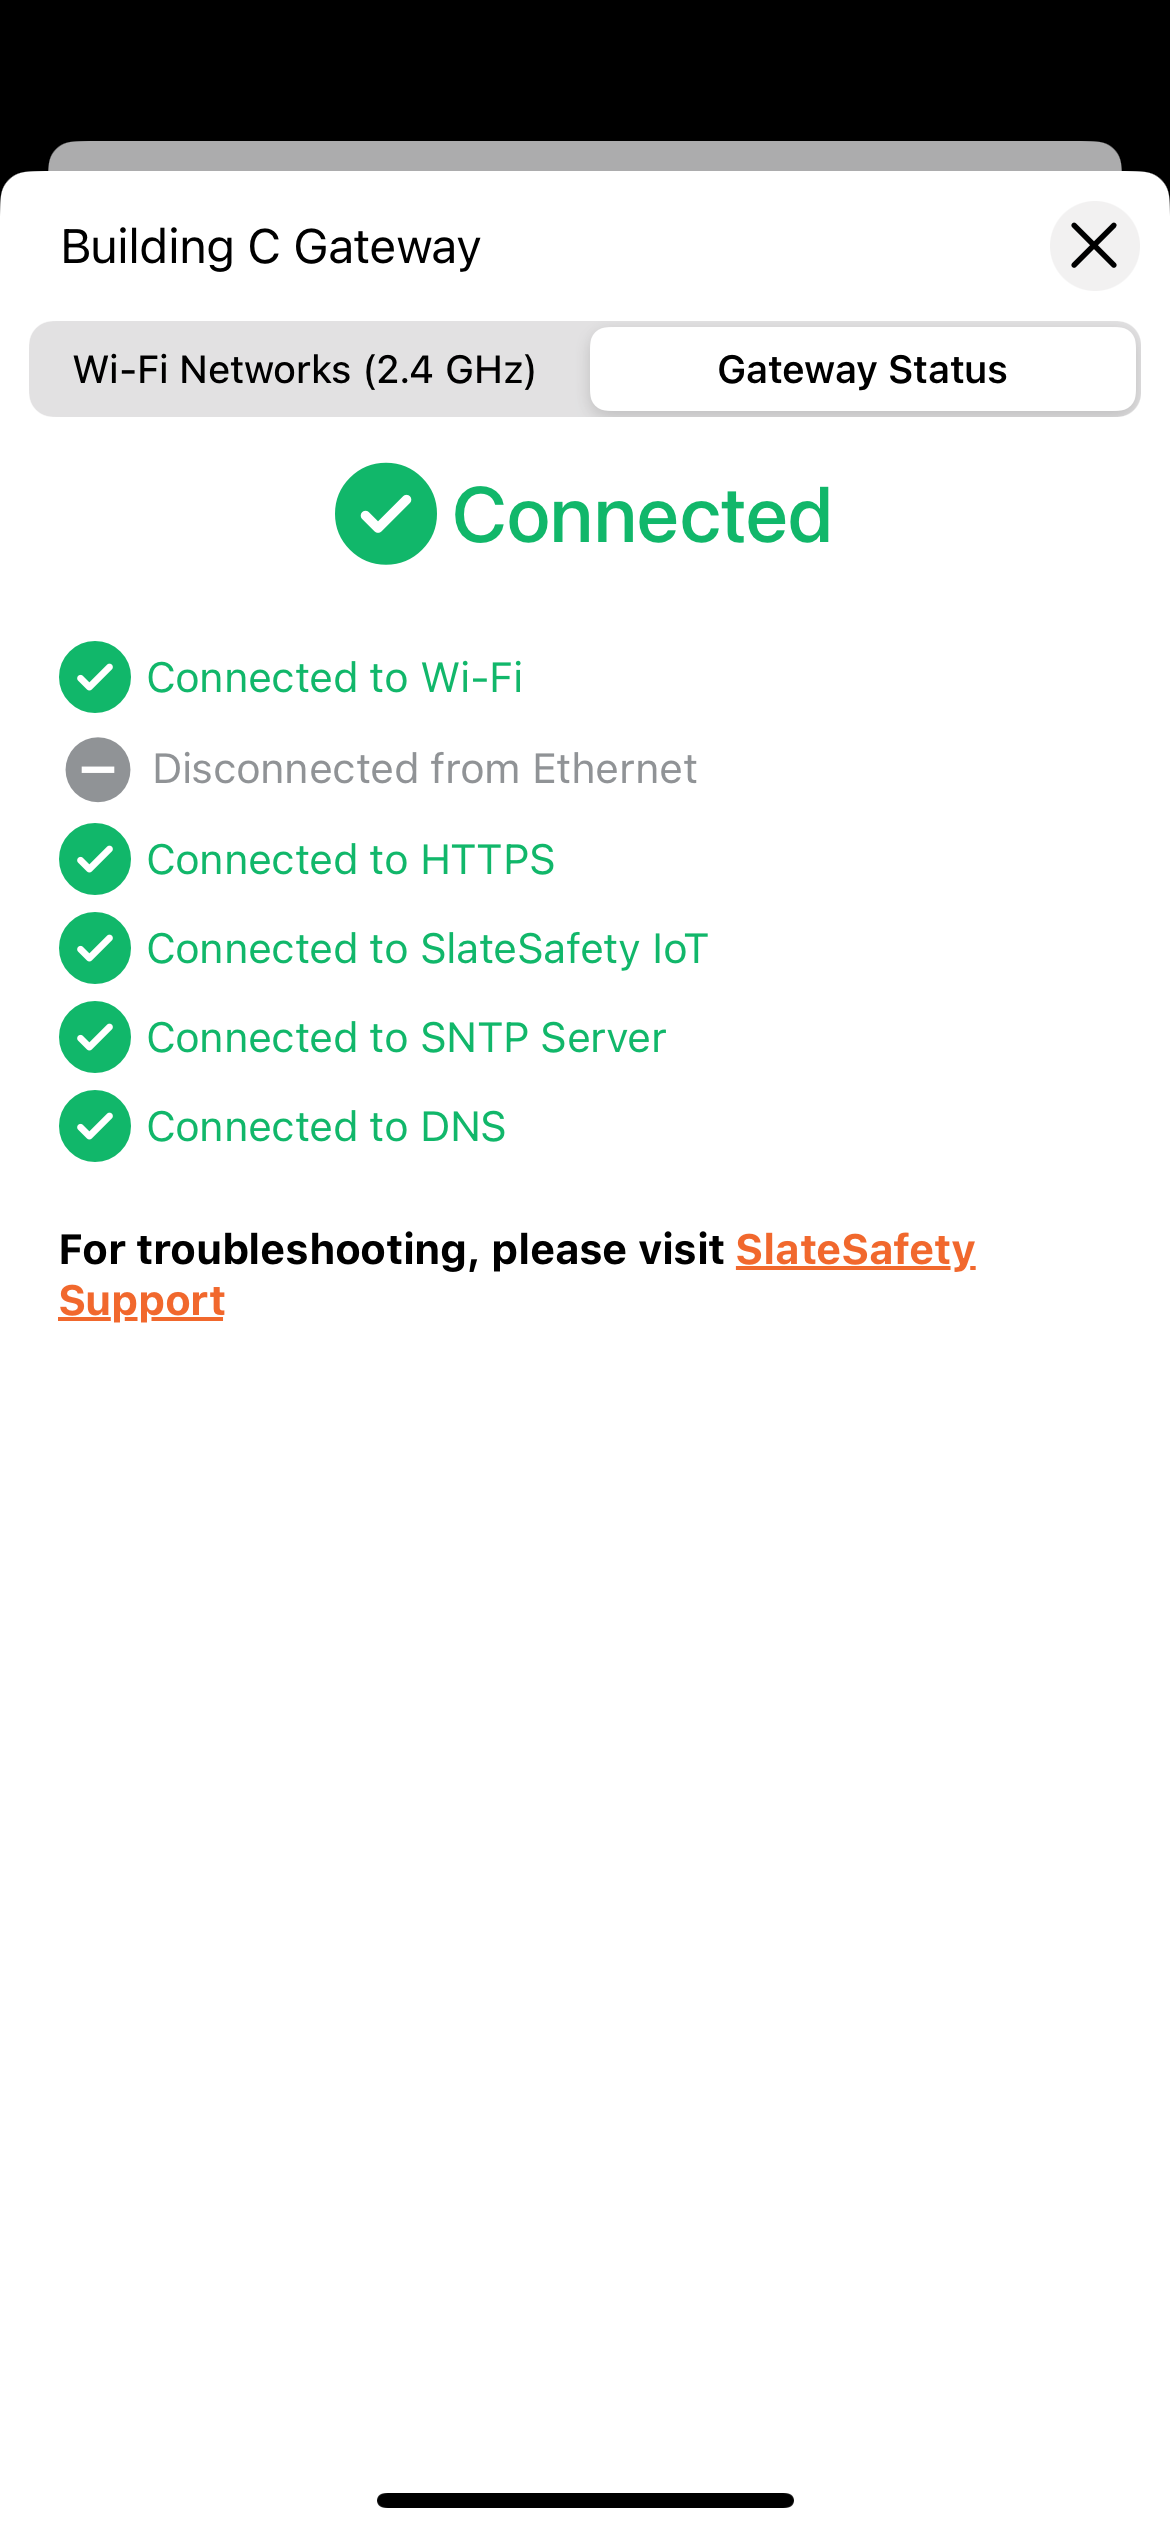
- Wait for the Gateway Status to update. Upon success, Gateway Status will say "Connected". If it does not connect, then try resetting your Gateway by pressing the "RESET" button on the top of the Gateway. If the Gateway remains disconnected, then ensure that each of the connections to HTTPS, SlateSafety IoT, SNTP, and DNS are all successful. If any of these ports are not connected, then please consult your IT department to open the ports listed in the section above.
- If BAND V2s or BEACON V2s are nearby a GATEWAY V2, then the indicator light labeled A should occasionally flash red. Red flashes occur when the GATEWAY V2 successfully receives data from nearby BAND V2s and BEACON V2s.
Will a GATEWAY V2 connect to a mobile Hotspot?
Yes.